

A word processor is a digital tool that lets you create, edit, format, and save text documents on your computer or smart device. Coming with a bunch of advantages over traditional pen and paper, there aren’t many people who haven’t used one at some point.
But, everyone has different levels of ability, so we thought it would be useful to have a simple-but-detailed look at word processing software, what the basic functions are, and where you can find them. So, there’s the intro – let’s get into word processing software, and what it can do.
Contents
Contents
The Basics:
We’re going to take things right from the top, and if you’re reading this, you probably know what’s coming next. But, this is a ‘101’ article, so we’re going to get right down to the basics of word processing software before we take a look at everything else.
1. ‘Which word processor should I use?’
There are many word processors available, each with its own features and functionalities – and, if you’re a beginner, knowing which one to go for may leave you feeling a little overwhelmed. Here are some of the most-used ones.
Microsoft Word: The industry standard, offering a vast array of tools for professional and personal use.
Google Docs: A free, cloud-based word processor with excellent collaboration features. Perfect for working on documents with others online.
Apple Pages: Designed for Mac users, Pages offers a user-friendly interface and integrates seamlessly with other Apple products.
OfficeSuite Documents: This is a very viable alternative to Microsoft Word, offering a high level of compatibility with other file formats, and is just one part of an office pack that also features Sheets, Slides, PDF, & Mail.
If you’re feeling a little overwhelmed with choice, take a look at our guide on what to look for in a free word processor.
2. Common word processor terms
You’ll be seeing a bunch of terms being used in this guide, so just in case, we’ve put together a glossary of the most popular. But, seeing as that might be a bit long, it’s in a drop-down format, so just click the link below to show or hide the definitions.
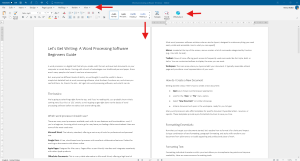
3. Understanding the interface
Most word processor software solutions share a similar layout, designed to make everything you need easily visible and accessible.
For the following guide and screenshots, we’ll be using OfficeSuite Documents.
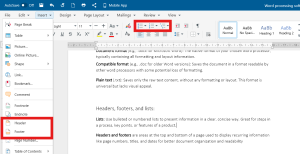
Menus: Located at the top of the screen, menus contain a list of commands categorized by function (e.g., File, Edit, Format).
Toolbars: Rows of icons offering quick access to frequently used commands like font style, bold, or italics. You can customize toolbars to display the ones you use most.
Workspace: The main area where you type and edit your document. It typically resembles a blank page and provides a visual representation of your work.
4. How to create a new document
Here’s how to create a new document:
- Open your chosen word processor application.
- Look for the “New” or “File” menu option, usually found towards the top-right of your menu.
- Select “New Document” (or something with similar phrasing).
- A blank document will open in the workspace, ready for you to start writing.
- Word processors also offer templates for specific document types like letters, resumes, or reports, providing a pre-formatted structure to save you time. More on that later.
Formatting:
Now that you’ve got your document started, let’s take a look at how to format it for clarity and impact. By using a combination of text formatting, paragraph formatting, and styles, your document will go from plain text to a visually appealing and professional piece of work.
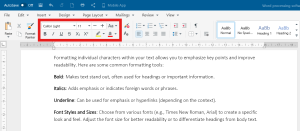
5. How to format text
Formatting individual characters within your text allows you to emphasize key points and improve readability. Here are some common formatting tools:
Bold: Makes text stand out, often used for headings or important information.
Italics: Adds emphasis or indicates foreign words or phrases.
Underline: Can be used for emphasis or hyperlinks (depending on the context).
Font styles, colors and sizes: Choose from various fonts (e.g., Times New Roman, Arial) to create a specific look and feel. Adjust the font size and color for better readability or to differentiate headings from body text.
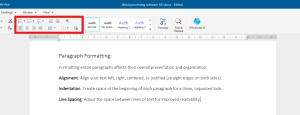
6. Paragraph formatting
Formatting entire paragraphs affects their overall presentation and organization and can help make your document quicker to read and easier on the eye.
Alignment: Align your text left, right, centered, or justified (straight edges on both sides).
Indentation: Create space at the beginning of each paragraph for a clean, organized look.
Line Spacing: Adjust the space between lines of text for improved readability.
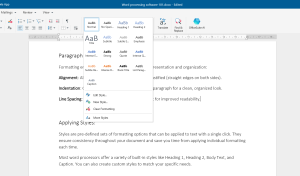
7. Applying styles
Styles are pre-defined sets of formatting options that can be applied to text with a single click, ensuring consistency throughout your document and saving you time from applying individual formatting for each instance.
Most word processors offer a variety of built-in styles like Heading 1, Heading 2, Body Text, and Caption. You can also create custom styles to match your specific needs.
Editing:
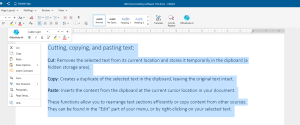
8. How to cut, copy, & paste text
These common word processor functions allow you to rearrange text sections efficiently or copy content from other sources. They can be found in the “Edit” part of your menu, or by right-clicking on your selected text.
Cut: Removes the selected text from its current location and stores it temporarily in the clipboard (a hidden storage area). You can use the keyboard shortcut Ctrl+X
Copy: Creates a duplicate of the selected text in the clipboard, leaving the original text intact. You can use the keyboard shortcut Ctrl+C
Paste: Inserts the content from the clipboard at the current cursor location in your document. You can use the keyboard shortcut Ctrl+V.
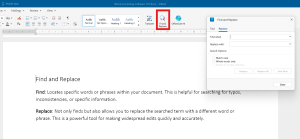
9. Find & replace
Find: Locates specific words or phrases within your document. This is helpful for searching for typos, inconsistencies, or specific information.
Replace: Not only finds but also allows you to replace the searched term with a different word or phrase. This is a powerful tool for making widespread edits quickly and accurately.
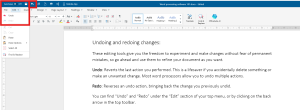
10. Undo and redo
These editing tools give you the freedom to experiment and make changes without fear of permanent mistakes, so go ahead and use them to refine your document as you want.
Undo: Reverts the last action you performed. This is a lifesaver if you accidentally delete something or make an unwanted change. Most word processors allow you to undo multiple actions.
Redo: Reverses an undo action, bringing back the change you previously undid.
You can find “Undo” and “Redo” under the “Edit” section of your top menu, or by clicking on the back arrow in the top toolbar.
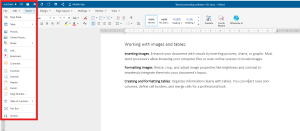
11. Working with images, shapes, & tables
Inserting images and shapes: Enhance your document with visuals by inserting pictures, charts, or graphs. Most word processors allow browsing your computer files or even online sources to locate images.
Formatting images: Resize, crop, and adjust image properties like brightness and contrast to seamlessly integrate them into your document’s layout.
Creating and formatting tables: Organize information clearly with tables. You can insert rows and columns, define cell borders, and merge cells for a professional look.
12. Headers, footers, & lists
Lists: Use bulleted or numbered lists to present information in a clear, concise way. Great for steps in a process, key points, or features of a product.
Headers and footers are areas at the top and bottom of a page used to display recurring information like page numbers, titles, and dates for better document organization and readability
13. Spellcheck & autocorrect
There’s no need to worry about your spelling. Depending on your word processor, you’ll be able to find spell check features under the “Review” tab in the top menu.

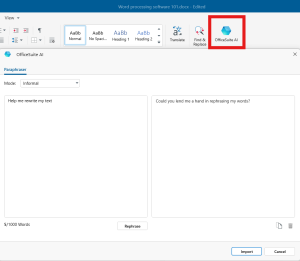
14. AI assistance
Some word processors will have an AI assistant to help you with your writing. With OfficeSuite Documents, just hit the button in your toolbar and let the assistant help you refine your writing. More on that here.
15. Templates
Save time and effort by using pre-designed templates. These offer pre-formatted layouts for specific document types like resumes, business letters, or brochures. You can usually find these under the “File” menu, where you’ll then need to click on “New”, or when you open a new, blank document.

16. Keyboard shortcuts
Most word processors offer keyboard shortcuts for frequently used commands. Learning these shortcuts can significantly boost your productivity. Here are some of the more common ones you can use in OfficeSuite and other word processors. The shortcuts may vary on the software you use.
Bold: Ctrl+B
Italic: Ctrl+I
Underline: Ctrl+U
Print: Ctrl+P
Save: Ctrl+s
Find: Ctrl+F
Replace: Ctrl+H
Copy: Ctrl+C
Cut: Ctrl+X
Paste: Ctrl+V
Collaboration and sharing:
Sharing your work is easy. Most word processors offer built-in sharing features, including the ability to save your work to a cloud storage service like MobiDrive, Google Drive or OneDrive. Then, within the platform, you can invite others to access and edit the document by sharing a link.
This allows for real-time collaboration, where everyone can see changes as they happen. Alternatively, you can choose to send a copy of your document as a PDF or another format, depending on whether you want them to edit it or just view it.
Here’s a lot more information on how to use MobiDrive.
17. Saving your work
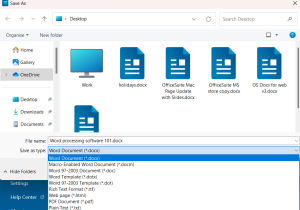
Before you share your work, it’s super important to save it. Most word processors offer various file formats to choose from, but here are some of the more common ones you’ll find.
Document format (e.g., .docx for Microsoft Word): The native format of your chosen word processor, typically containing all formatting and layout information.
Compatible format (e.g., .doc for older Word versions): Saves the document in a format readable by other word processors with some potential loss of formatting.
Plain text (.txt): Saves only the raw text content, without any formatting or layout. This format is universal but lacks visual appeal.
PDF: Saving your work as a PDF is a great way to preserve the formatting of the file if you’re not sure what software or device the recipient is using. You can read more about how to save pages as a PDF in our handy guide.
You can save your work by clicking “File” from your top menu, or using the shortcut Ctrl+S.
18. Comments & tracked changes
Even if you’re not working in real-time, you can still collaborate through comments and track changes:
Comments: Allow you to leave notes or questions directly within the document for others to see and address.
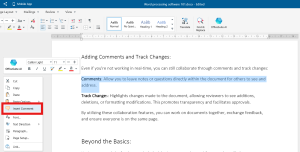
Track changes: Highlights changes made to the document, allowing reviewers to see additions, deletions, or formatting modifications. This promotes transparency and facilitates approvals.
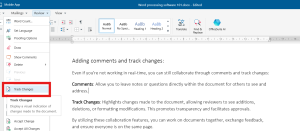
By using these collaboration features, you can work on documents with anyone else, exchange feedback, and ensure everyone is on the same page.
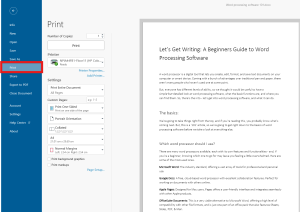
19. Printing
Once your document is finalized, you might want to print a physical copy. Here’s what to consider:
Formatting for print: Adjust margins, headers, and footers to ensure everything fits correctly on the page. You can often use a “Print Preview” function to visualize the layout before printing.
Printing options: Most word processors offer printing options like selecting which pages to print, number of copies, and duplex printing (double-sided).
20. More word processing tips
So, there’s a quick look into how to use a word processor, and should be enough to get you typing away happily. The good news is that we a have a bunch of other articles which can help you create written content using OfficeSuite Documents, or any other word document.
How To Convert Pages To PDF – Find out more about PDFS, why they are great, and how you can convert your work.
How To Copy A Word Document – Knowing how to copy a word document is important for when you want to share or preserve your work. Here’s how.
What To Look For In A Free Word Processor – There are many word processors out there, but how do you choose one? Well, you can find out here.
How to brainstorm with Documents – Word processors are a great tool for brainstorming. Here are some tips on how to get your creativity flowing.